How to increase Wi-Fi Strength
Have you ever found yourself in a situation where you’re in a café or outdoors, trying to get some work done, only to find that your laptop is struggling to get a strong Wi-Fi signal? If so, fear not, as there’s a simple trick that can come to your rescue.
In today’s DIY IT Diagnostics post, we’ll explore how adjusting the roaming sensitivity settings on your Windows PC can significantly enhance your Wi-Fi signal strength.

Introduction:
By default, Windows PCs are set to a “medium” roaming aggressiveness, which means that the device will only switch to a stronger Wi-Fi signal if the current connection is very poor. However, this can result in slow or inconsistent Wi-Fi connectivity, especially when you’re relying on public networks or are on the go. But fret not, by tweaking the roaming sensitivity to a more aggressive setting, you can force your device to connect to a stronger signal even if the current connection is still decent.
How do you boost your Wi-Fi strength?
Here’s a step-by-step guide:
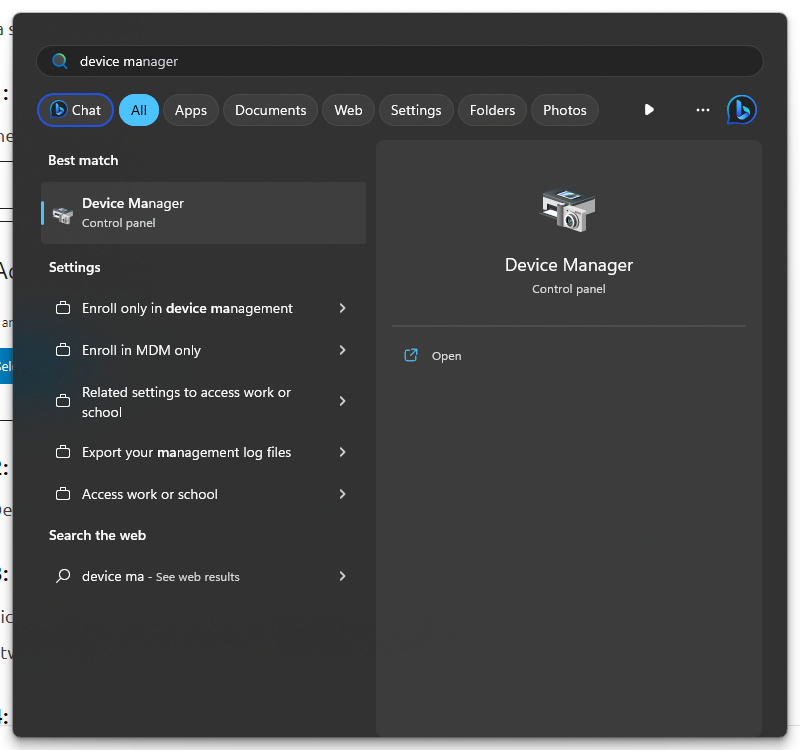
Step 1:
Open the Device Manager on your Windows PC by right-clicking on the Start button and selecting “Device Manager.”
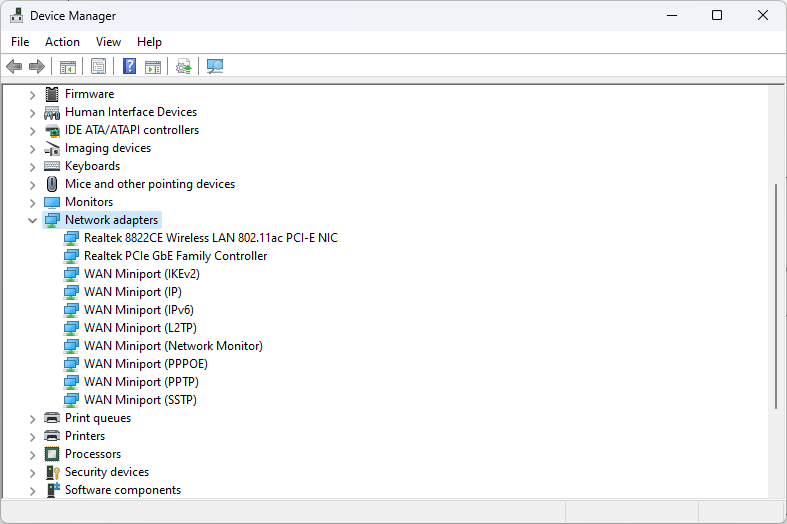
Step 2:
In the Device Manager window, click on the “Network Adapters” drop-down menu to expand it.
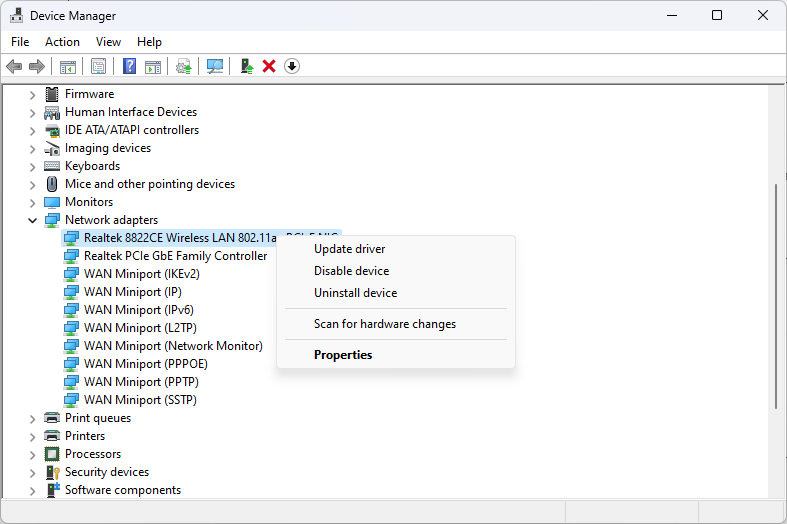
Step 3:
Right-click on your Wi-Fi driver, which is usually labeled with the word “Wi-Fi” or the name of your network adapter, and select “Properties” from the context menu.
Step 5:
In the Properties window, navigate to the “Advanced” tab.
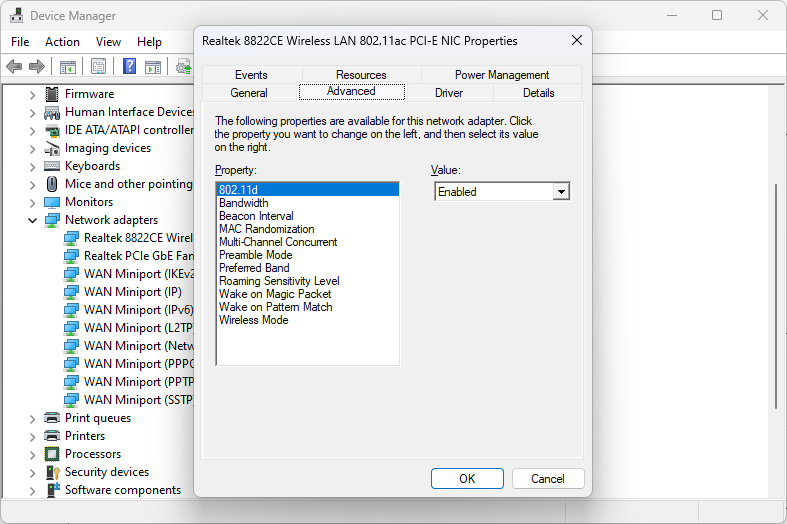
Step 4:
Look for the “Roaming Sensitivity,” “Roaming Aggressiveness,” or a similar setting. The exact name may vary depending on your Wi-Fi driver.
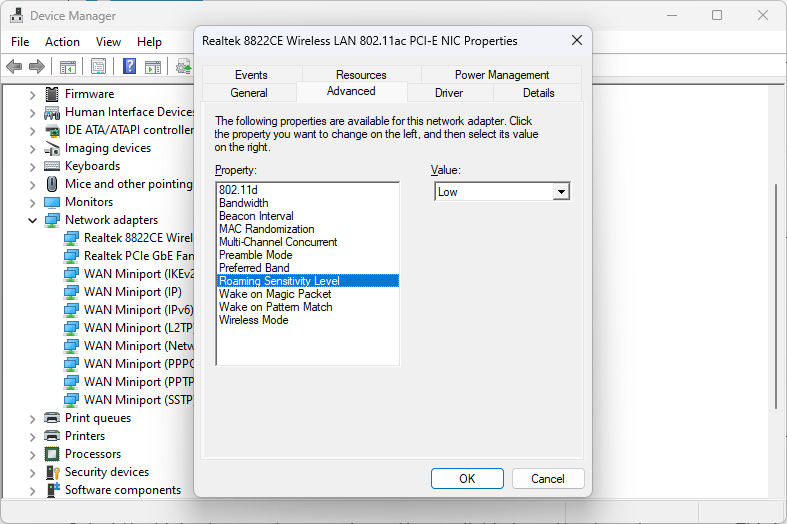
Step 6:
Select the highest or most aggressive option available from the drop-down menu. This is usually labeled as “High” or “Aggressive.”
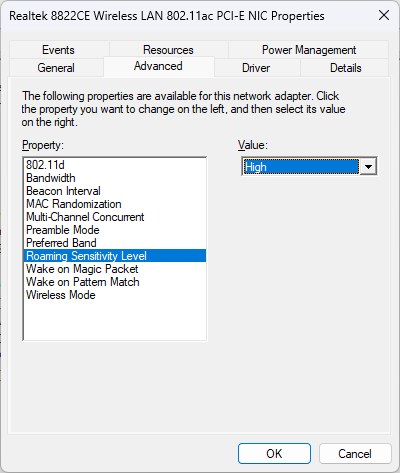
By adjusting the roaming sensitivity to a more aggressive setting, you’re telling your Windows PC to prioritize stronger Wi-Fi signals even if the current connection is still decent. This can significantly improve your Wi-Fi signal strength and provide a smoother browsing experience, especially when you’re working in areas with weak or fluctuating Wi-Fi signals.
Trade-off
However, it’s important to keep in mind that using a more aggressive roaming sensitivity setting may lead to slightly increased power consumption, which can drain your device’s battery life more quickly. Therefore, it’s recommended to use this setting selectively and revert to the default setting when you no longer require the extra signal boost.
Conclusion:
Now you have the knowledge to overcome weak Wi-Fi signals and ensure a strong and reliable connection for your Windows PC. Whether you’re working remotely, studying in a café, or simply browsing the internet on the go, adjusting the roaming sensitivity settings can make a noticeable difference in your Wi-Fi experience. Stay connected, stay productive, and enjoy seamless browsing with this handy DIY IT Diagnostics tip!